WordPress is the most popular CMS (content management system) platform available today, powering 43% of all websites on the Internet, including this one. To install WordPress locally on a computer requires first creating a “localhost” consisting of the Apache web server, MySQL (or its community fork MariaDB) database management system, and optionally phpMyAdmin for administering the database server. While each component can be installed separately, an easier way is to install all of these together with a web server solution stack such as XAMPP.
An even easier alternative is installing with Docker, which offers a containerized (isolated) environment for installing all components with a small easily readable code. Earlier I described how to use a Dockerfile to create a single docker container. In contrast, here each component will run inside its own container, and a docker-compose.yml (or .yaml) file will allow these containers to communicate with each other in a multi-container environment.
If you would like to follow along, make sure you have both Docker and Docker Compose installed on your computer. I prefer working with terminals, and use docker CLI (command line interface) on a linux platform. You may instead prefer installing docker desktop that offers a simpler interface.
Docker-compose
First I created a working folder ~/Documents/Wordpress, moved into it, and created a subfolder Wordpress and an empty file docker-compose.yml, using the following commands on a terminal:
> mkdir ~/Documents/Wordpress
> cd ~/Documents/Wordpress
> mkdir Wordpress
> touch docker-compose.yml
Next I opened docker-compose.yml on a text editor and added the following code snippet:
---
version: "3.8"

services:
  # Database
  db:
    container_name: wp_mysql
    image: mysql:8.0.30
    volumes:
      - db_data:/var/lib/mysql
    restart: unless-stopped
    environment:
      MYSQL_ROOT_PASSWORD: password
      MYSQL_DATABASE: wordpress
      MYSQL_USER: wordpress
      MYSQL_PASSWORD: wordpress

  # Wordpress
  wordpress:
    depends_on:
      - db
    container_name: wp_wordpress
    image: wordpress:6.0.2-apache
    ports:
      - 80:80
    restart: unless-stopped
    volumes:
      - ./Wordpress:/var/www/html
    user: 1000:984
    environment:
      WORDPRESS_DB_HOST: db:3306
      WORDPRESS_DB_NAME: wordpress
      WORDPRESS_DB_USER: wordpress
      WORDPRESS_DB_PASSWORD: wordpress

  # phpmyadmin (optional)
  phpmyadmin:
    depends_on:
      - db
    container_name: wp_phpmyadmin
    image: phpmyadmin:5.2.0-apache
    ports:
      - 8000:80
    restart: unless-stopped
    environment:
      PMA_HOST: db
      MYSQL_ROOT_PASSWORD: password
      UPLOAD_LIMIT: 300M

# persistent volume mount
volumes:
  db_data:
  Wordpress:
The file begins with the compose file version number compatible with the latest docker engine (not necessary), and launches three containers for the services MySQL, WordPress, and the optional phpMyAdmin, each starting with its latest stable docker image. I prefer pinning the image version number instead of using the “latest” tag, to keep the installation robust and portable. Each container is explicitly named (also not necessary) and configured to restart if stopped, for example after a reboot.
The MySQL container launches first, because the other two depend on it and they wouldn’t start otherwise. The volume db_data is mapped to the container database path /var/lib/mysql. And the required environmental variables for MySQL root password, database name, user name and user password are assigned.
The WordPress container port 80 is mapped to the host port 80, enabling browser access with http://localhost. The website install path /var/www/html in the container is mapped to the previously created subfolder Wordpress, and user permission is set by assigning user: $UID:$GID, to override the default read-only access (commands echo $UID and echo $GID will give you UID and GID values on most linux machines). Finally the necessary environment variables are set: the database host to MySQL’s default port 3306, and the names and password same as MySQL’s.
These two services, MySQL in the backend and WordPress in the frontend, are sufficient for a minimal WordPress stack. But I additionally defined a phpMyAdmin service and mapped the container port 80 to the host port 8000, to manage the database from http://localhost:8000. Environmental variables include UPLOAD_LIMIT to override the default database import size limit of 2MB.
At the last step, the mapped volumes are made persistent so they are accessible even when containers are down.
WordPress
Let’s spin up WordPress with the command docker-compose up -d (detached mode), and list images and containers with commands docker images and docker ps:
> docker-compose up -d
>
> docker images
REPOSITORY TAG IMAGE ID CREATED SIZE
mysql 8.0.30 dbaea59d1b41 10 days ago 449MB
phpmyadmin 5.2.0-apache dfa5f07e88dc 12 days ago 511MB
wordpress 6.0.2-apache 7198f531a71c 12 days ago 609MB
>
> docker ps
CONTAINER ID IMAGE COMMAND CREATED STATUS
faa0c153b8fe phpmyadmin:5.2.0-apache "/docker-entrypoint.…" About a minute ago Up About a minute
401cfc14e4c8 wordpress:6.0.2-apache "docker-entrypoint.s…" About a minute ago Up About a minute
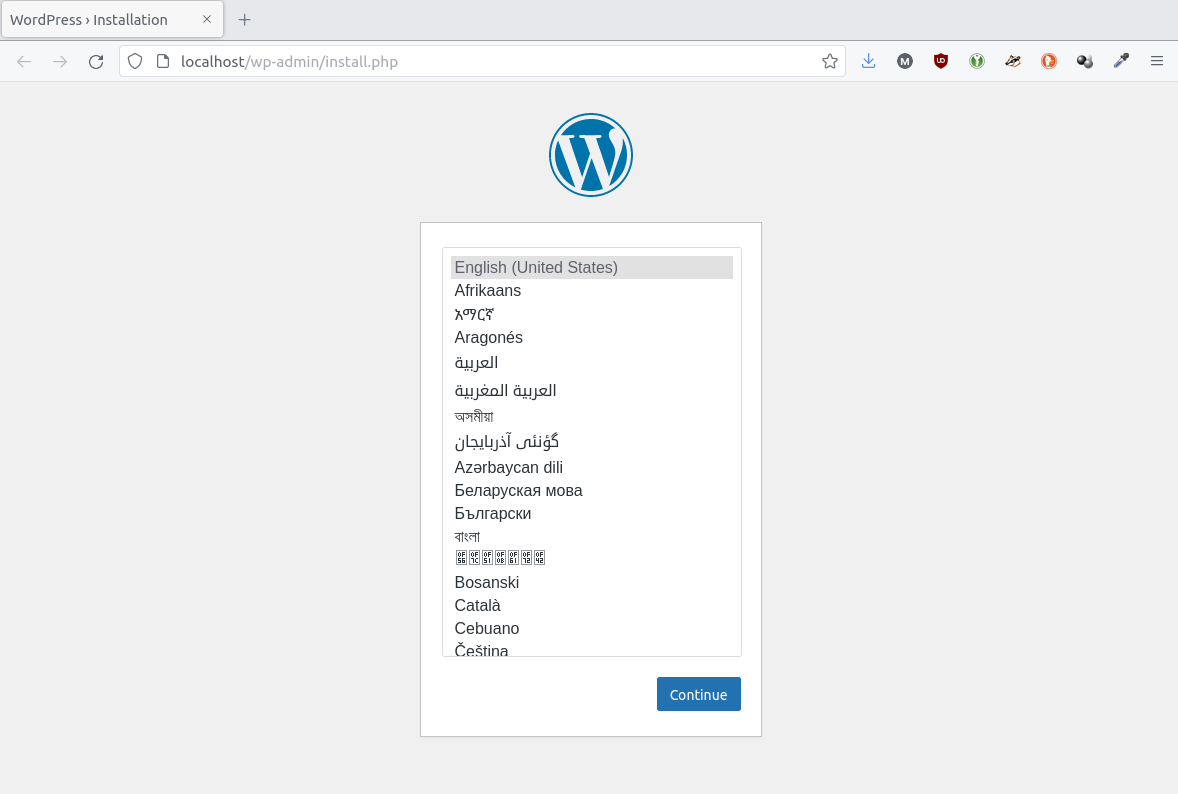
fa36ce4e223d mysql:8.0.30 "docker-entrypoint.s…" About a minute ago Up About a minuteTyping http://localhost on your favorite browser should launch the famous 5-min WordPress install page:
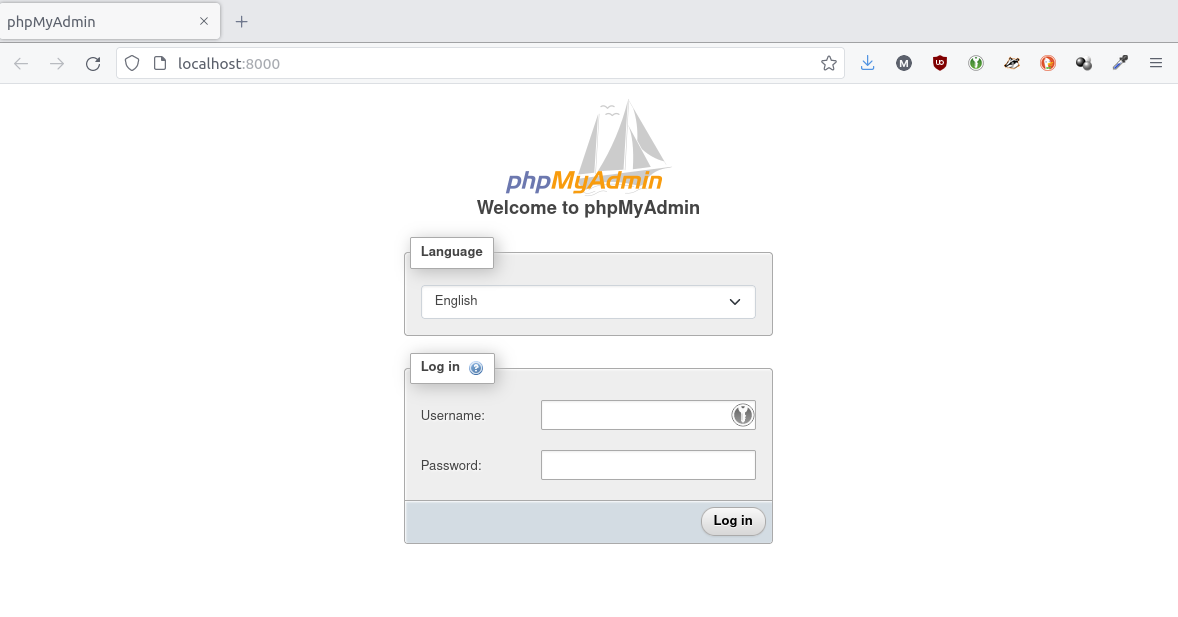
And http://localhost:8000 should start phpMyAdmin:
On a final note, all containers can be stopped and removed with one command:
> docker-compose down
Hi there! I am Roy, founder of Quantiux and author of everything you see here. I am a data scientist, with a deep interest in playing with data of all colors, shapes and sizes. I also enjoy coding anything that catches my fancy.
Leave a comment below if this article interests you, or contact me for any general comment/question.